Quick instructions
7. Instructions for activities
7.4. H5P Conversion
H5P Conversion – Converting Interactive Content to the New H5P Format
Many of our H5P users have created materials and assignments using the older H5P Interactive Content tool. This tool will eventually be phased out, and its current support is limited—updates may not work reliably. Therefore, TUNI Moodle will transition to the newer H5P core activity.
This guide helps you convert tasks created with the old H5P tool into the new format.
Step 1: Convert Interactive Content to a File
- Open the old activity: “H5P – Interactive Content”.
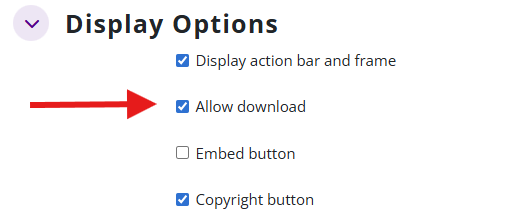
- Go to Settings and ensure downloading is allowed under Display Options.
- Click Reuse > Download as an .h5p file.
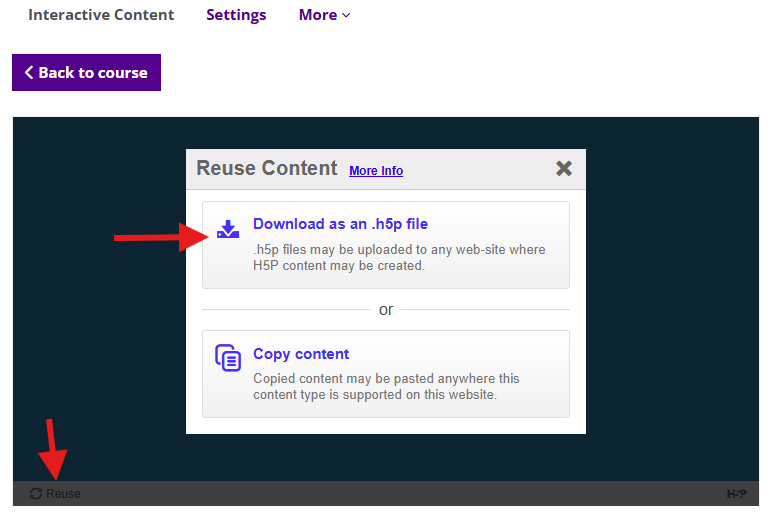
- Save the file to your computer.
- Open your file manager and locate the browser’s default download folder (usually Downloads). Rename the file if needed to something descriptive.
Step 2: Upload the H5P File to the Content Bank
- Return to the Moodle course homepage.
- Click More > H5P Content Bank.
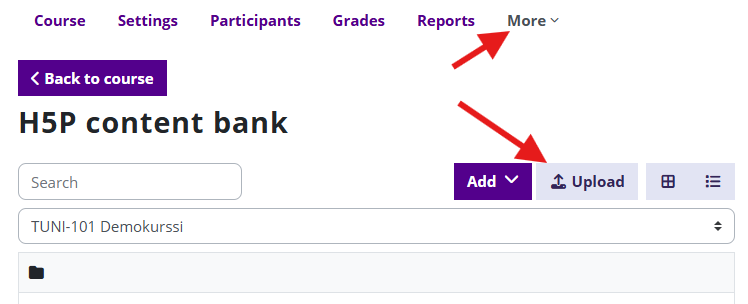
- Click Upload and drag the file from your file manager to the drop area.
- Click Save Changes.
- Edit the H5P content if needed using the Edit button. You can rename the file via the More menu.
- Return to the content bank using the Exit button.
Step 3: Add H5P Content to the Course Page
- Go back to the course homepage and add a new activity: H5P (blue icon).
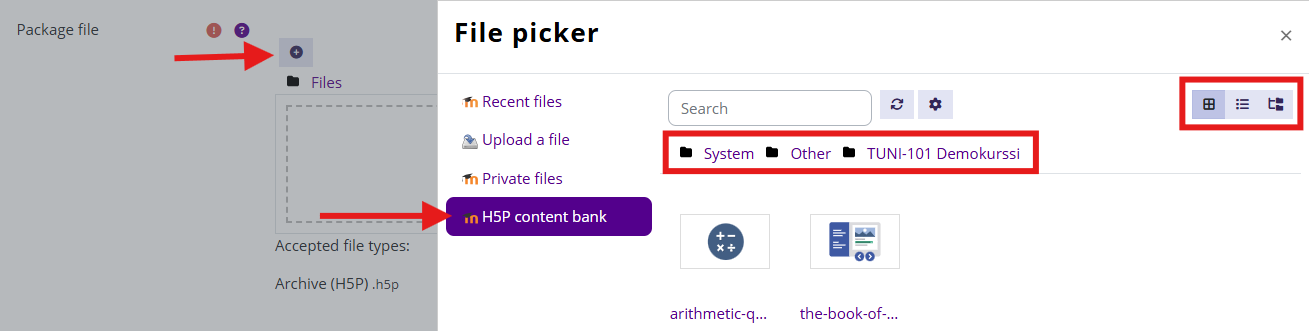
- Give it a suitable name and select the correct content from the H5P Content Bank under Package File.
- If you skip the content bank and drag the .h5p file directly into the activity, it will remain inside the activity and cannot be reused elsewhere via the content bank.
- Click the drop area or the plus icon.
- Choose the H5P Content Bank view.
- Hover over the content to see file names and select the correct one by left-clicking.
- You can also select H5P files from another course’s content bank.
- Use the buttons on the right to switch between list or tree view.
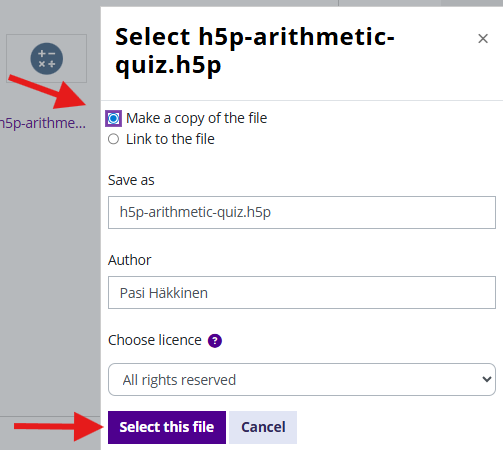
- Copy or link the H5P file from the H5P content bank to a new H5P activity on a course page
- Copying is the recommended option, because this way the H5P activity remains fully independent and can be edited directly within the activity even after course copying.
- Choose the Link to the file option if the same H5P file is used in several different H5P activities and you want to make changes to all of them at once through the H5P content bank. Note that when a course is copied, the link will still point to the H5P file in the content bank of the old course. This means that editing the H5P activity in the new course must be done from the old course’s content bank.
- Click Select this file.
Configure Additional Settings
- Grading: Optional scoring.
- Attempt settings: Choose whether student responses are saved and whether students can view their submissions later.
Click Save Changes and verify that the activity works correctly in the student view (Switch role to Student).